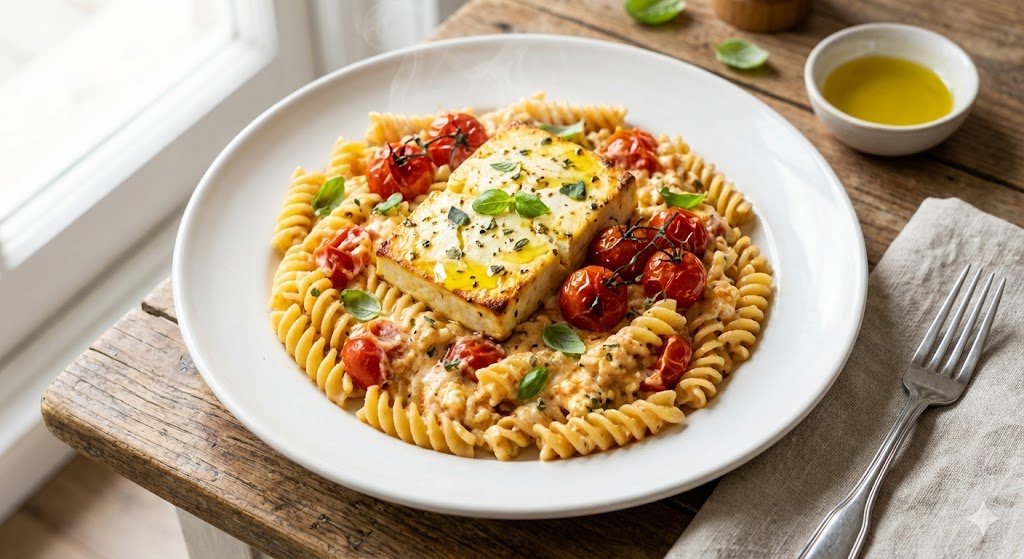
This baked feta pasta is a gentle, low-effort comfort meal perfect for busy or low-energy days. The creamy feta and sweet roasted tomatoes create a rich sauce with almost no stirring—making it disability-friendly and beginner-friendly.
Ingredients
2 cups cherry tomatoes
1 block (7 oz) feta cheese
3 tbsp olive oil
2 cloves garlic, minced
8 oz pasta (penne, rotini, or bowtie)
Salt & pepper to taste
Optional: basil or spinach
Instructions
Preheat oven to 400°F.
Place tomatoes in a baking dish and drizzle with olive oil.
Place feta in the center and add garlic, salt, and pepper.
Bake for 25–30 minutes until tomatoes burst.
Cook pasta while baking.
Mix baked feta and tomatoes into pasta until creamy.
Add basil or spinach if desired.
FAQs
Can I use any pasta? Yes! Any pasta shape works.
Is this freezer-friendly? Yes, store in airtight containers for up to 2 months.
Can I make it dairy-free? Use vegan feta and plant-based pasta.
Printable Recipe Card
Baked Feta Pasta
Prep: 5 min | Cook: 30 min | Serves: 4
Mix roasted feta and tomatoes with pasta for a creamy, comforting meal.
The tortilla wrap hack is a viral, customizable meal that’s perfect for low-energy cooking. Fold, stuff, and pan-fry for a crispy, comforting wrap in minutes.
Ingredients
1 large tortilla
Shredded cheese
Cooked chicken or turkey
Salsa or sauce
Butter or oil for pan
Instructions
Cut one slit from center to edge of tortilla.
Add fillings in each quarter.
Fold tortilla into a triangle.
Pan-fry in butter or oil until golden on both sides.
Serve warm.
FAQs
Can I air fry it? Yes, air fry at 375°F for 6–8 minutes.
What fillings work best? Chicken, cheese, beans, or veggies.
These air fryer chicken bites are crispy, juicy, and ready in under 15 minutes—perfect for tired days when you still want something delicious.
Ingredients
1 lb chicken breast, cubed
1 tbsp olive oil
1 tsp garlic powder
1 tsp paprika
Salt & pepper
Instructions
Toss chicken with oil and seasonings.
Place in air fryer basket.
Cook at 400°F for 10–12 minutes, shaking halfway.
Serve with dipping sauce.
FAQs
Can I use frozen chicken? Yes, add 3–5 extra minutes.
Are these meal-prep friendly? Yes, store in fridge up to 4 days.
Printable Recipe Card
Air Fryer Chicken Bites
Prep: 5 min | Cook: 12 min | Serves: 4
Crispy, juicy, and perfect for low-effort meals.
Try This Next
If you enjoy comforting, effortless sides like this, you may also love my Air-Fryer Smashed Potatoes with whipped Feta, for a globally inspired comfort meal.
This Turkish-inspired pasta is simple, comforting, and deeply satisfying. Creamy garlic yogurt meets warm pasta and a buttery paprika drizzle, creating a dish that feels both grounding and special. It’s global comfort food made approachable for everyday kitchens.
Why This Recipe Works
Balanced flavors without heavy sauces
Budget-friendly ingredients
Quick preparation with layered taste
A comforting alternative to traditional cream-based pastas
Ingredients
12 oz pasta (penne or rotini work best)
1 cup plain Greek yogurt
2 cloves garlic, minced
2 tbsp butter
1 tsp smoked paprika
½ tsp chili flakes (optional)
Salt to taste
Fresh parsley or dill for garnish
Instructions
Cook pasta in salted water until al dente. Reserve ¼ cup pasta water before draining.
In a bowl, mix yogurt, garlic, and a pinch of salt until smooth.
Melt butter in a small pan over low heat. Add paprika and chili flakes, stirring gently until fragrant.
Toss warm pasta with yogurt mixture, adding reserved pasta water as needed for smoothness.
Drizzle spiced butter over the pasta.
Garnish with fresh herbs and serve warm.
Helpful Tips
Let pasta cool slightly before adding yogurt to prevent curdling
Use full-fat yogurt for best texture
Add roasted vegetables or chickpeas for extra nourishment
Pair It With
If this recipe speaks to you, you may also enjoy my Spaghetti Carbonara for classic comfort or Classic Homemade Lasagna for slow, layered warmth.
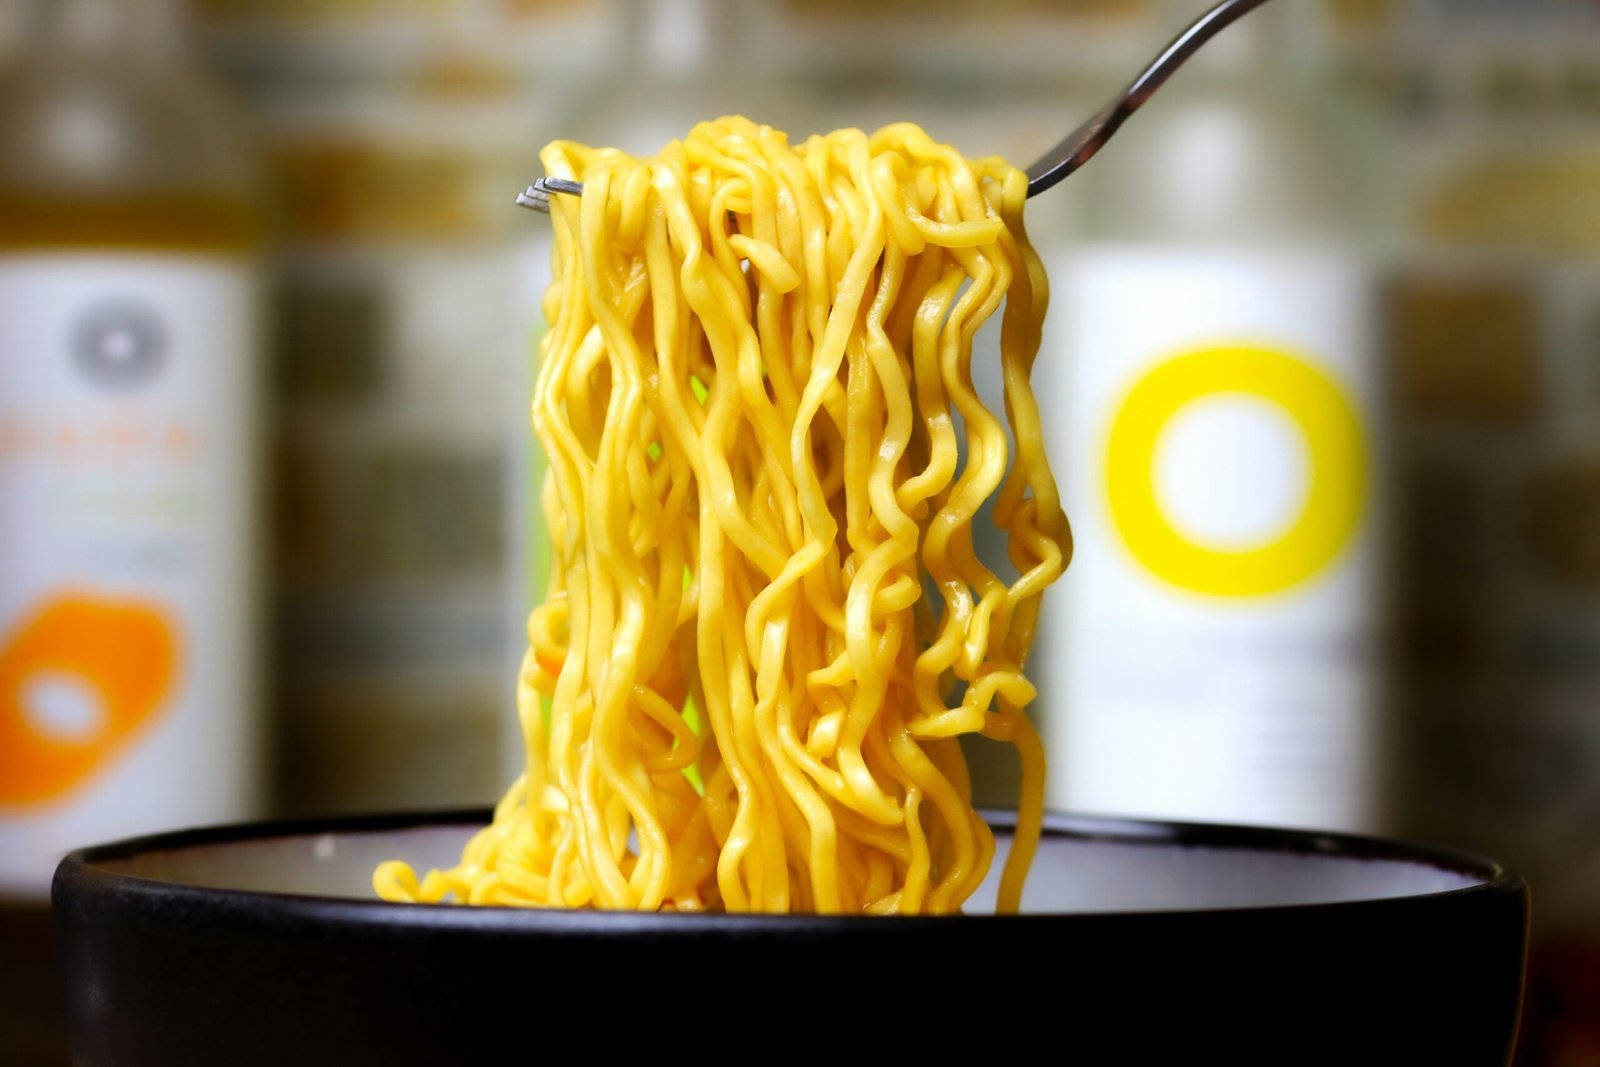
Some days, cooking needs to feel simple. Not rushed. Not complicated. Just warm, comforting, and easy enough to meet you where you are.
This one-pot pasta was created for those moments.
Everything cooks together in a single pot — pasta, vegetables, seasonings, and broth — so dinner comes together without extra steps or piles of dishes. It’s a dependable recipe for busy weeknights, low-energy days, or anytime you want a nourishing meal without pressure.
Why This One-Pot Pasta Is a Favorite
This recipe works because it’s forgiving.
Cooking the pasta directly in the broth allows it to absorb flavor while naturally thickening the sauce. The vegetables soften gently as everything simmers, and the seasonings blend without needing precise timing or constant attention.
It’s simple food, made with care.
Recipe Overview
Prep Time: 10 minutes
Cook Time: 15 minutes
Total Time: 25 minutes
Servings: 4
Skill Level: Beginner-friendly
Best For: Busy weeknights, minimal cleanup, calm cooking
Ingredients
12 oz pasta (spaghetti, penne, or similar)
1 tablespoon olive oil
4 cups vegetable or chicken broth (water may be used if needed)
2 cups fresh vegetables (spinach, bell peppers, carrots, or a mix)
1 teaspoon garlic powder
1 teaspoon Italian seasoning
Salt and pepper, to taste
Optional Add-Ins
Cooked chicken, sausage, or shrimp
Grated parmesan cheese
Fresh herbs such as basil or parsley
Use what you have. This recipe is flexible by design.
Cooking Directions
In a large pot, heat the olive oil over medium heat.
Add the dry pasta, broth, and vegetables to the pot.
Sprinkle in garlic powder, Italian seasoning, salt, and pepper. Stir gently to combine.
Bring the mixture to a boil, then reduce heat to low. Cover and simmer for 10–12 minutes, stirring occasionally, until the pasta is tender and most of the liquid is absorbed.
If using cooked protein, stir it in during the last few minutes of cooking.
Remove from heat and let the pasta rest for 1–2 minutes before serving.
Serve warm, topped with cheese or fresh herbs if desired.
Gentle Tips for Perfect One-Pot Pasta
Stir occasionally to prevent sticking.
Taste the pasta a minute or two before it’s done — overcooking happens quickly.
If the pot looks dry before the pasta is tender, add a small splash of broth or water.
Cooking doesn’t need to be rushed. Let it move at a steady pace.
Easy Variations & Substitutions
Use gluten-free pasta (add extra liquid as needed)
Swap vegetables based on what’s in season or already in your fridge
Add red pepper flakes for a little warmth
Stir in a splash of cream or dairy-free alternative at the end for richness
This meal adapts to you.
Storage and Reheating
Store leftovers in an airtight container in the refrigerator for up to three days.
To reheat, add a small splash of broth or water and warm gently over low heat, stirring until heated through.
Nutrition & Nourishment Notes
This one-pot pasta offers a balanced base of carbohydrates and vegetables, with the option to add protein for extra nourishment. Portions and ingredients can be adjusted to suit individual needs and preferences.
A Quiet Closing Note
If this recipe helped your evening feel a little lighter, that’s enough. Food doesn’t need to be perfect to be meaningful — it just needs to care for you in the moment you’re in.
Try This Next
If you enjoy simple, comforting pasta meals, you may also love my Classic Homemade Lasagna for slow, layered comfort, or Spaghetti Carbonara, a simple and honest Italian classic.
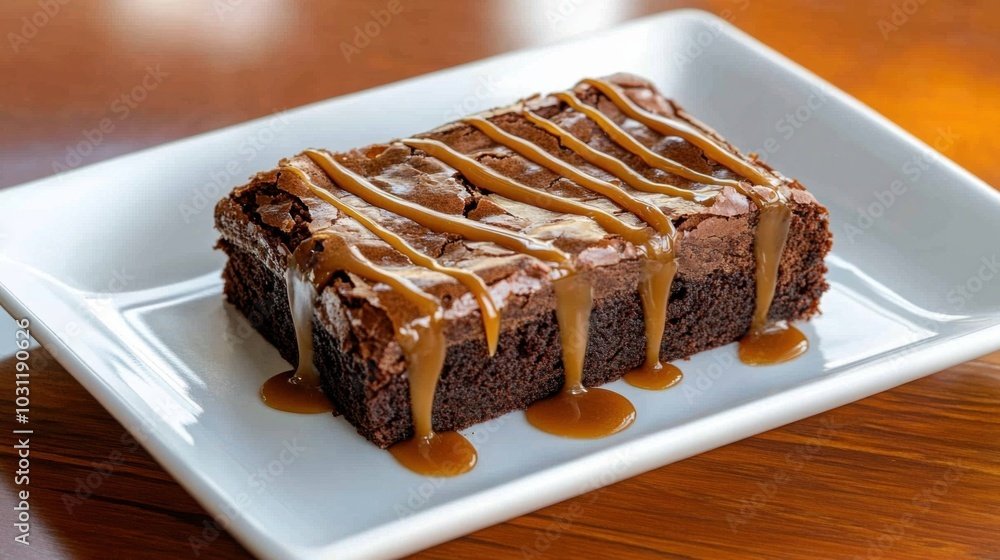
Some desserts are meant to impress. Others are meant to comfort.
These caramel brownies do both.
Rich, fudgy chocolate meets soft, buttery caramel in a way that feels indulgent without being overwhelming. This is the kind of recipe you make when you want to slow the moment down — whether you’re baking for loved ones, sharing something sweet, or simply giving yourself permission to enjoy a quiet treat at home.
No rushing. No perfection required. Just warm brownies, made with care.
Why These Caramel Brownies Work So Well
This recipe is designed for balance.
The brownie base is deeply chocolatey and moist, while the caramel adds just enough sweetness and softness without overpowering the chocolate. Swirling the caramel between layers keeps it evenly distributed, so every bite feels intentional.
These brownies are forgiving, beginner-friendly, and adaptable — which makes them perfect for everyday baking or special occasions.
Recipe Overview
Prep Time: 20 minutes
Cook Time: 25 minutes
Total Time: 45 minutes
Servings: 12 brownies
Skill Level: Beginner-friendly
Best For: Gatherings, gifting, or quiet evenings at home
Ingredients
1 cup (2 sticks) unsalted butter
2 cups granulated sugar
4 large eggs, room temperature
1 teaspoon vanilla extract
1 cup all-purpose flour
1 cup unsweetened cocoa powder
1 teaspoon salt
1 cup caramel sauce
Optional Add-Ins
Chocolate chips
Chopped nuts
A light sprinkle of sea salt
Use what feels right. This recipe allows room for preference.
Step-by-Step Directions
Preheat your oven to 350°F (175°C). Grease a 9×13-inch baking pan and set aside.
In a saucepan over low heat, melt the butter and sugar together, stirring continuously until smooth. Remove from heat and allow to cool slightly.
Whisk in the eggs one at a time, mixing gently after each addition. Stir in the vanilla extract.
Gradually fold in the flour, cocoa powder, and salt until just combined. The batter will be thick.
Pour half of the brownie batter into the prepared pan. Drizzle half of the caramel sauce evenly over the batter.
Spoon the remaining batter on top, then drizzle with the remaining caramel. Use a knife to gently swirl.
Bake for 25 minutes, checking for doneness near the edges while keeping the center soft.
Remove from the oven and allow to cool before slicing.
Gentle Tips for Perfect Brownies
For a shiny brownie top, beat the eggs and sugar thoroughly before adding dry ingredients.
Avoid overbaking — brownies continue to set as they cool.
Add caramel just before baking to prevent it from sinking too deeply into the batter.
Baking is a rhythm. Let it be steady, not rushed.
Variations & Simple Adjustments
Add espresso powder for deeper chocolate flavor
Use dairy-free butter and caramel for dietary needs
Sprinkle flaky sea salt on top before baking for contrast
This recipe adapts to you.
Storage & Reheating
Store brownies in an airtight container at room temperature for up to one week.
To enjoy warm, reheat individual pieces in the microwave for a few seconds until soft and gooey.
Nutrition & Enjoyment Notes
Each brownie contains approximately 200 calories, with a balance of fats, carbohydrates, and sugars meant for mindful enjoyment. Portions can be adjusted based on preference.
A Quiet Closing Thought
Dessert doesn’t have to be complicated to be meaningful. Sometimes, it’s enough to slow down, bake something warm, and let sweetness exist without apology.
If these brownies brought a moment of comfort, they did exactly what they were meant to do.
Try This Next
If you enjoy thoughtful indulgence, you may also love Classic Chocolate Chip Cookies or explore more from Refined Baking & Desserts.
Some recipes don’t need embellishment — they need understanding
Spaghetti Carbonara is one of those dishes. At its heart, it’s a humble combination of pasta, eggs, cheese, and cured meat, brought together with care and timing. When done gently, carbonara becomes silky, comforting, and deeply satisfying without feeling heavy or complicated.
This recipe is written to help you feel confident, not rushed. Whether this is your first time making carbonara or your tenth, the goal is the same: a warm, steady meal that comes together with intention.
Why Carbonara Feels Intimidating (And Why It Doesn’t Have to Be)
Carbonara has a reputation for being tricky, mostly because the sauce relies on heat control rather than cream. But once you understand the rhythm of the dish, it becomes one of the most forgiving pasta recipes you can make.
The key is patience — letting the heat of the pasta do the work instead of forcing the process.
Recipe Overview
Prep Time: 10 minutes
Cook Time: 20 minutes
Total Time: 30 minutes
Servings: 4
Skill Level: Beginner-friendly with guidance
Best For: Comfort meals, quiet evenings, traditional Italian flavors
Ingredients
400g spaghetti
150g pancetta or guanciale, diced
3 large eggs, room temperature
100g grated parmesan or pecorino cheese
Freshly cracked black pepper, to taste
Salt, for pasta water
These ingredients are simple on purpose. Quality matters more than quantity here.
Step-by-Step Directions
Bring a large pot of well-salted water to a boil. Cook the spaghetti until just al dente, following package instructions.
While the pasta cooks, place a pan over medium heat and add the pancetta or guanciale. Cook until lightly crisp and the fat has rendered, about 5–7 minutes.
In a bowl, whisk the eggs together with the grated cheese and a generous amount of freshly cracked black pepper.
Reserve about one cup of pasta water, then drain the spaghetti.
Add the hot pasta directly to the pan with the pancetta. Remove the pan from heat.
Slowly stir in the egg and cheese mixture, tossing continuously so the residual heat creates a smooth, creamy sauce. Add reserved pasta water a little at a time if needed.
Serve immediately, topped with extra cheese and black pepper.
Gentle Tips for a Silky Sauce
Always remove the pan from heat before adding the eggs.
Stir continuously — this keeps the sauce smooth instead of scrambled.
Pasta water is your safety net. Use it to adjust texture without stress.
Carbonara rewards calm attention more than speed.
Ingredient Notes & Substitutions
Guanciale is traditional, but pancetta works beautifully.
If needed, turkey bacon can be used as a substitute, though flavor will vary.
Avoid adding cream — the eggs and cheese create the sauce naturally.
Serving & Storage
Serve carbonara immediately while warm and silky.
Leftovers can be stored in an airtight container in the refrigerator for up to two days, though the texture is best enjoyed fresh. Reheat gently over low heat with a splash of water.
Nutrition & Balance Notes
Each serving contains approximately 550 calories, offering protein, carbohydrates, and fats in a balanced, satisfying portion. Adjust portion size based on personal preference and dietary needs.
A Quiet Closing Thought
Carbonara isn’t about perfection. It’s about timing, care, and trusting simple ingredients to do what they’ve always done — come together into something comforting.
If this dish helped you slow down and enjoy the moment, it was made exactly as intended.
Try This Next
For more comforting pasta favorites, try Turkish Pasta with Garlic Yogurt Drizzle for gentle global comfort, or Classic Homemade Lasagna when you want something warm and familiar.
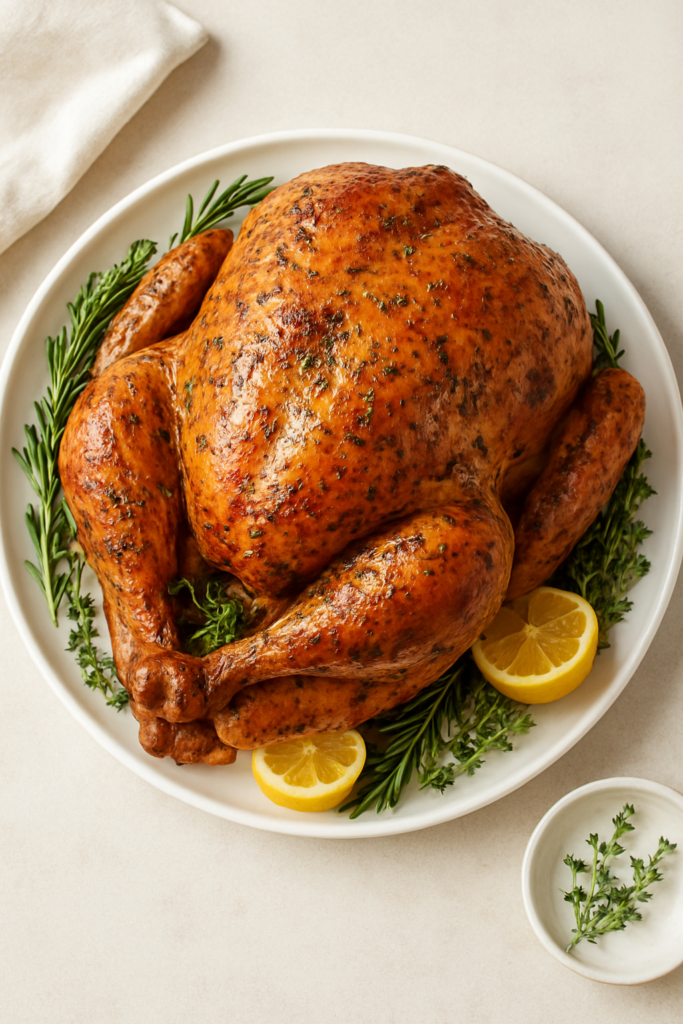
Cooking a whole turkey can feel heavy before it even begins. There’s timing to think about, guests to consider, and the quiet pressure of wanting everything to turn out just right.
This herb-roasted turkey recipe is written to take some of that pressure off.
It’s steady, forgiving, and designed to guide you step by step — whether this is your first turkey or one of many. The result is a beautifully seasoned bird with crisp skin, juicy meat, and flavors that feel comforting rather than complicated.
Why This Herb Turkey Works
This recipe relies on simple, fresh herbs and gentle heat. Spreading the seasoned butter under the skin keeps the breast meat moist while allowing the skin to brown slowly. Roasting at a lower temperature gives the turkey time to cook evenly, reducing dryness and stress.
It’s not about rushing — it’s about trust and patience.
Recipe Overview
Prep Time: 20 minutes (plus thawing time if frozen)
Cook Time: 3–4 hours, depending on turkey size
Total Time: Approximately 4–5 hours
Servings: 10–12
Skill Level: Beginner-friendly with guidance
Best For: Holidays, gatherings, meaningful meals
Ingredients
1 whole turkey (12–16 pounds), fully thawed
1 cup unsalted butter, softened (or ½ cup olive oil)
4 cloves garlic, minced
1 tablespoon fresh rosemary, chopped
1 tablespoon fresh thyme, chopped
1 tablespoon fresh sage, chopped
2 tablespoons fresh parsley, chopped
1 tablespoon salt
1 teaspoon black pepper
1 lemon, halved
1 onion, quartered
4–6 whole garlic cloves
Extra fresh herbs for the cavity (optional)
2 cups chicken broth(optional, for roasting pan)
Step-by-Step Directions
1. Preheat the Oven
Preheat your oven to 325°F (165°C).
2. Prepare the Turkey
Remove the giblets and neck from the cavity. Pat the turkey completely dry with paper towels. Dry skin helps achieve better browning.
3. Make the Herb Butter
In a bowl, mix softened butter (or olive oil) with minced garlic, rosemary, thyme, sage, parsley, salt, and pepper until well combined.
4. Season the Turkey
Gently loosen the skin over the breast using your fingers. Spread a portion of the herb butter underneath the skin. Rub the remaining mixture over the outside of the turkey.
5. Stuff the Cavity
Place lemon halves, onion quarters, whole garlic cloves, and optional herbs inside the cavity. This adds aroma without overpowering the meat.
6. Prepare the Roasting Pan
Place the turkey breast-side up on a rack in a roasting pan. Pour chicken broth into the bottom of the pan if using.
7. Roast the Turkey
Roast at 325°F until the thickest part of the thigh reaches 165°F.
General guideline: 13–15 minutes per pound
If the skin browns too quickly, tent loosely with foil
8. Rest Before Carving
Remove the turkey from the oven and let it rest for 20–30 minutes. This allows juices to redistribute and makes carving easier.
Gentle Tips for a Juicy Turkey
Fully thaw the turkey before cooking
Don’t skip resting time — it matters
Use a thermometer instead of guessing
Lower heat equals more forgiving results
There’s no need to rush this process.
Variations & Adjustments
Use dried herbs if fresh aren’t available (use half the amount)
Swap butter for olive oil for a lighter option
Add carrots and celery to the roasting pan for extra flavor
This recipe adapts to what you have.
Storage & Leftovers
Store leftover turkey in an airtight container in the refrigerator for up to 4 days.
Turkey freezes well and can be used later in soups, sandwiches, or casseroles.
Nutrition (Per Serving, Approximate)
Calories: 450
Protein: 55g
Fat: 22g
Carbohydrates: 2g
Fiber: 0g
Sugar: 0g
Sodium: Varies based on seasoning
A Quiet Closing Note
A well-cooked turkey isn’t about perfection. It’s about care, patience, and allowing the process to unfold without pressure.
If this recipe helped your meal feel steadier and more grounded, it did exactly what it was meant to do.
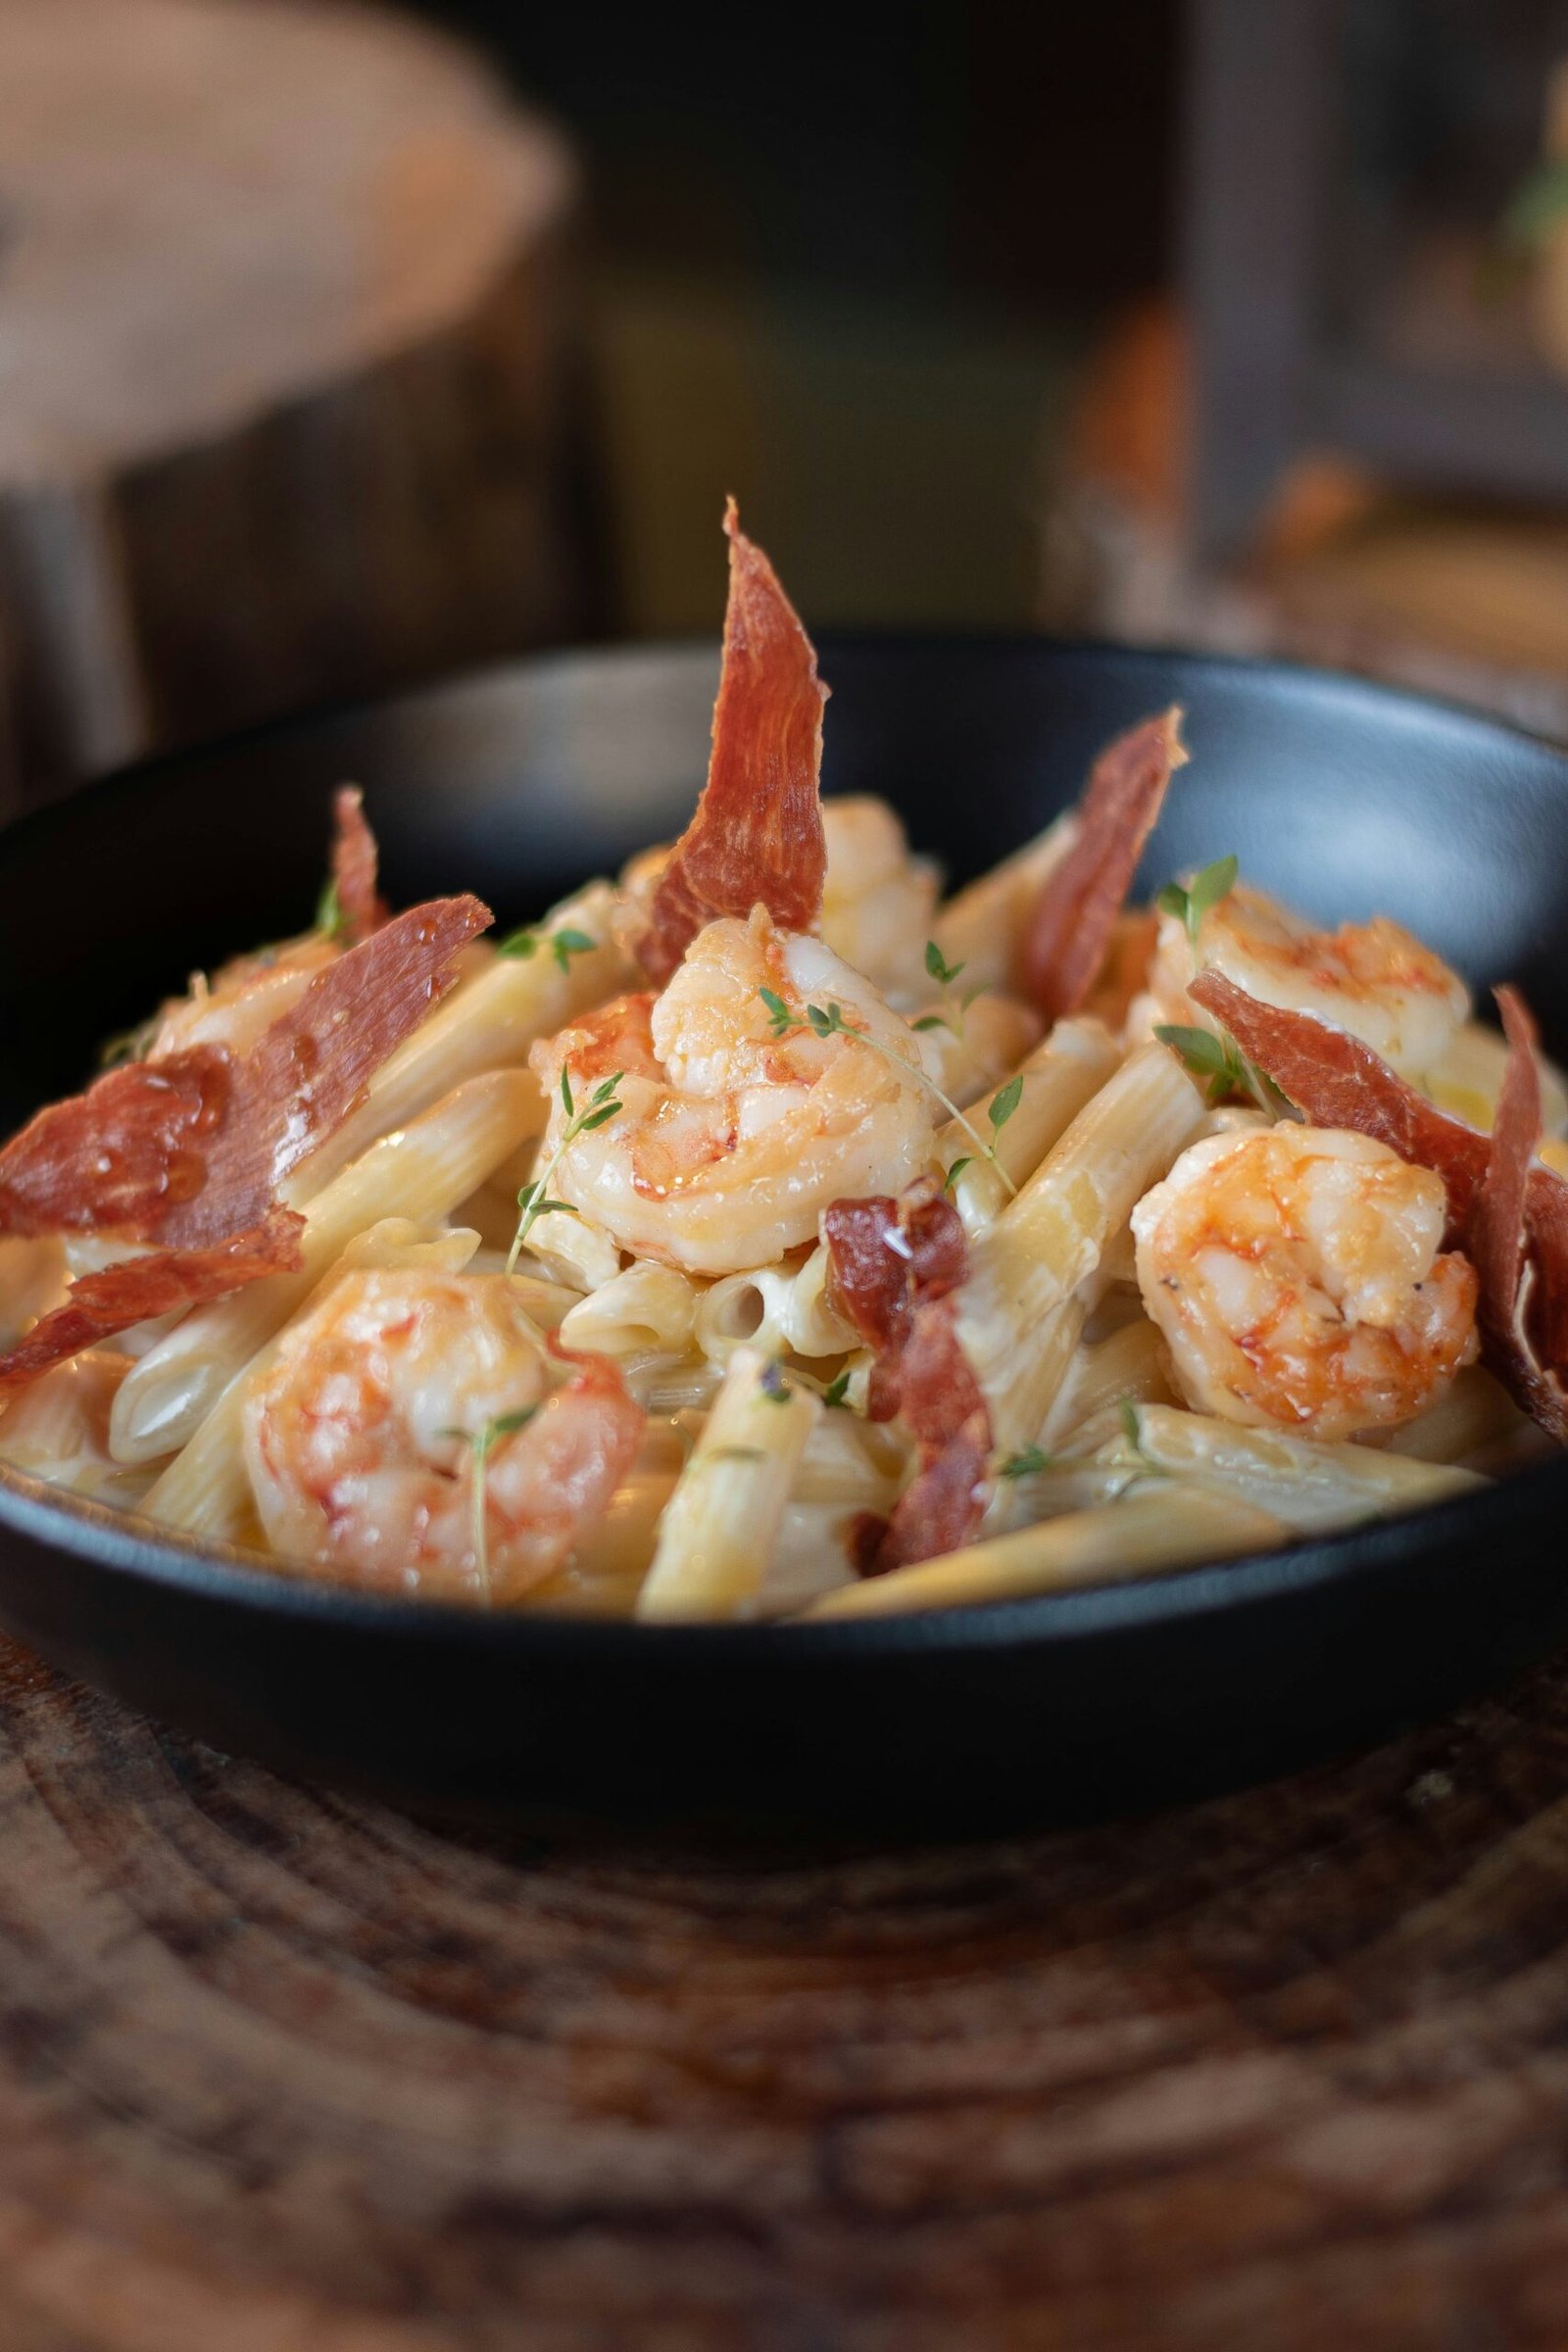
Some recipes earn their name quietly — not because they’re flashy, but because they linger. Marry Me Shrimp Pasta is one of those dishes. Rich without being heavy, creamy without being overwhelming, and filled with gentle layers of flavor, this pasta has become a favorite for romantic dinners and meaningful moments alike.
It’s the kind of meal that invites you to slow down, pour a glass of something warm, and stay at the table just a little longer.
What Is Marry Me Shrimp Pasta?
Marry Me Shrimp Pasta is a creamy Italian-inspired dish made with tender shrimp, garlic, tomatoes, parmesan cheese, and herbs, all wrapped in a silky cream sauce. The name comes from its reputation — one bite is said to be so comforting and satisfying that it could inspire a proposal.
Whether or not that happens, the dish delivers exactly what it promises: warmth, richness, and balance.
Why This Recipe Works
Shrimp cook quickly and stay tender when handled gently
Cream and parmesan create a smooth, cohesive sauce
Tomatoes cut through the richness with brightness
Italian herbs add depth without overpowering
This recipe focuses on timing, texture, and calm cooking, not rushing.
Recipe Overview
Prep Time: 10 minutes
Cook Time: 20 minutes
Total Time: 30 minutes
Servings: 4
Skill Level: Beginner to intermediate
Best For: Romantic dinners, special evenings, or comfort meals
Ingredients You’ll Need
8 oz (225 g) spaghetti or linguine
1 lb (450 g) shrimp, peeled and deveined
1 cup cherry tomatoes, halved (or sun-dried tomatoes for deeper flavor)
3 cloves garlic, minced
1 cup heavy cream
½ cup freshly grated parmesan cheese
1 teaspoon Italian seasoning
Salt and black pepper, to taste
Olive oil, for cooking
Fresh basil, for garnish
Step-by-Step Instructions
Bring a large pot of salted water to a boil and cook the pasta until al dente. Reserve ½ cup of pasta water, then drain and set aside.
Heat olive oil in a large skillet over medium heat. Add the garlic and sauté until fragrant, about 30 seconds.
Add shrimp in a single layer. Season lightly with salt and pepper. Cook for 2–3 minutes per side until pink and opaque. Remove shrimp and set aside.
In the same skillet, add tomatoes and cook for 2–3 minutes until softened.
Lower the heat and pour in the cream. Stir gently, allowing it to warm without boiling.
Add parmesan cheese slowly, stirring continuously until the sauce becomes smooth.
Stir in Italian seasoning. Add reserved pasta water as needed to loosen the sauce.
Return shrimp and pasta to the skillet. Toss gently until everything is evenly coated.
Remove from heat and garnish with fresh basil.
Tips for Perfect Results
Shrimp are done when they turn pink and curl gently
Keep heat low when adding cream to prevent separation
Grate parmesan fresh for best texture
Add chili flakes if you enjoy gentle heat
This dish rewards patience more than speed.
Variations & Add-Ins
Add spinach for color and nutrition
Use chicken instead of shrimp if preferred
Swap heavy cream for half-and-half for a lighter version
Try sun-dried tomatoes for a richer, deeper flavor
Serving Suggestions
Serve warm with:
Garlic bread
A simple green salad
Roasted vegetables
A quiet, candlelit table
This dish doesn’t need much — it already does the talking.
Storage & Reheating
Store leftovers in an airtight container in the refrigerator for up to 2 days. Reheat gently over low heat with a splash of cream or milk to restore the sauce.
Nutrition Information (Approximate)
Calories: 450 per serving
Protein: 25g
Carbohydrates: 50g
Fat: 15g
Nutrition varies based on ingredients used.
Frequently Asked Questions
Can I make this ahead of time? It’s best served fresh, but components can be prepped ahead and assembled just before serving.
What pasta works best? Long noodles like linguine or spaghetti hold the sauce beautifully, but any pasta you enjoy will work.
A Gentle Final Note
Marry Me Shrimp Pasta isn’t about impressing — it’s about care. It’s a meal made slowly, shared intentionally, and remembered long after the plates are cleared.
That’s what gives it its name.
Try This Next
For more cozy pasta dishes, explore Spicy Miso Carbonara for a bold twist, or Classic Homemade Lasagna for timeless comfort.
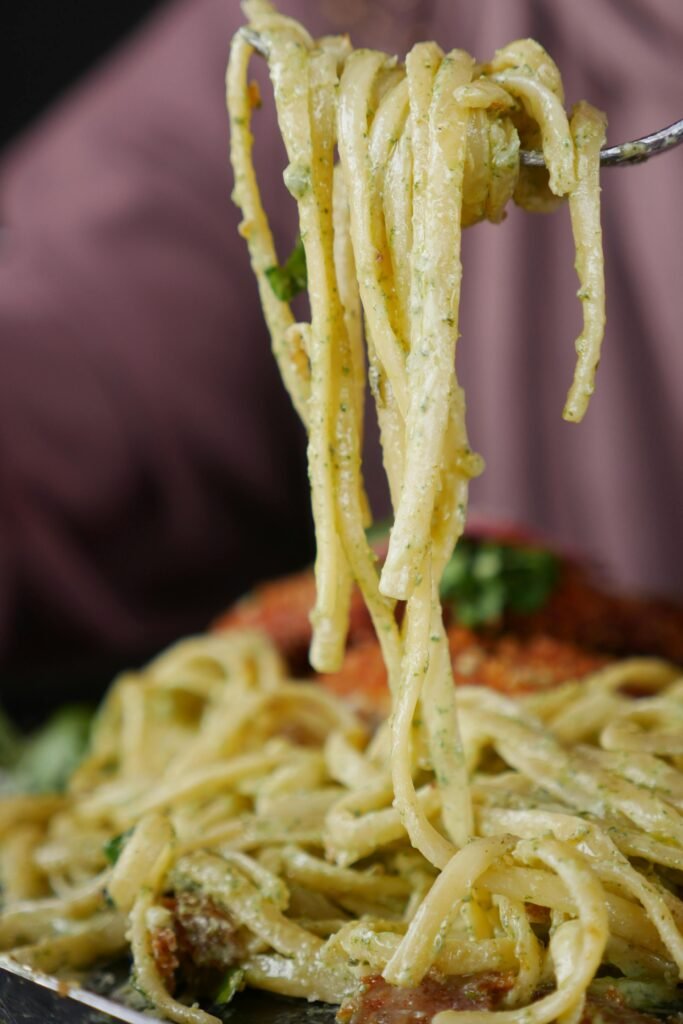
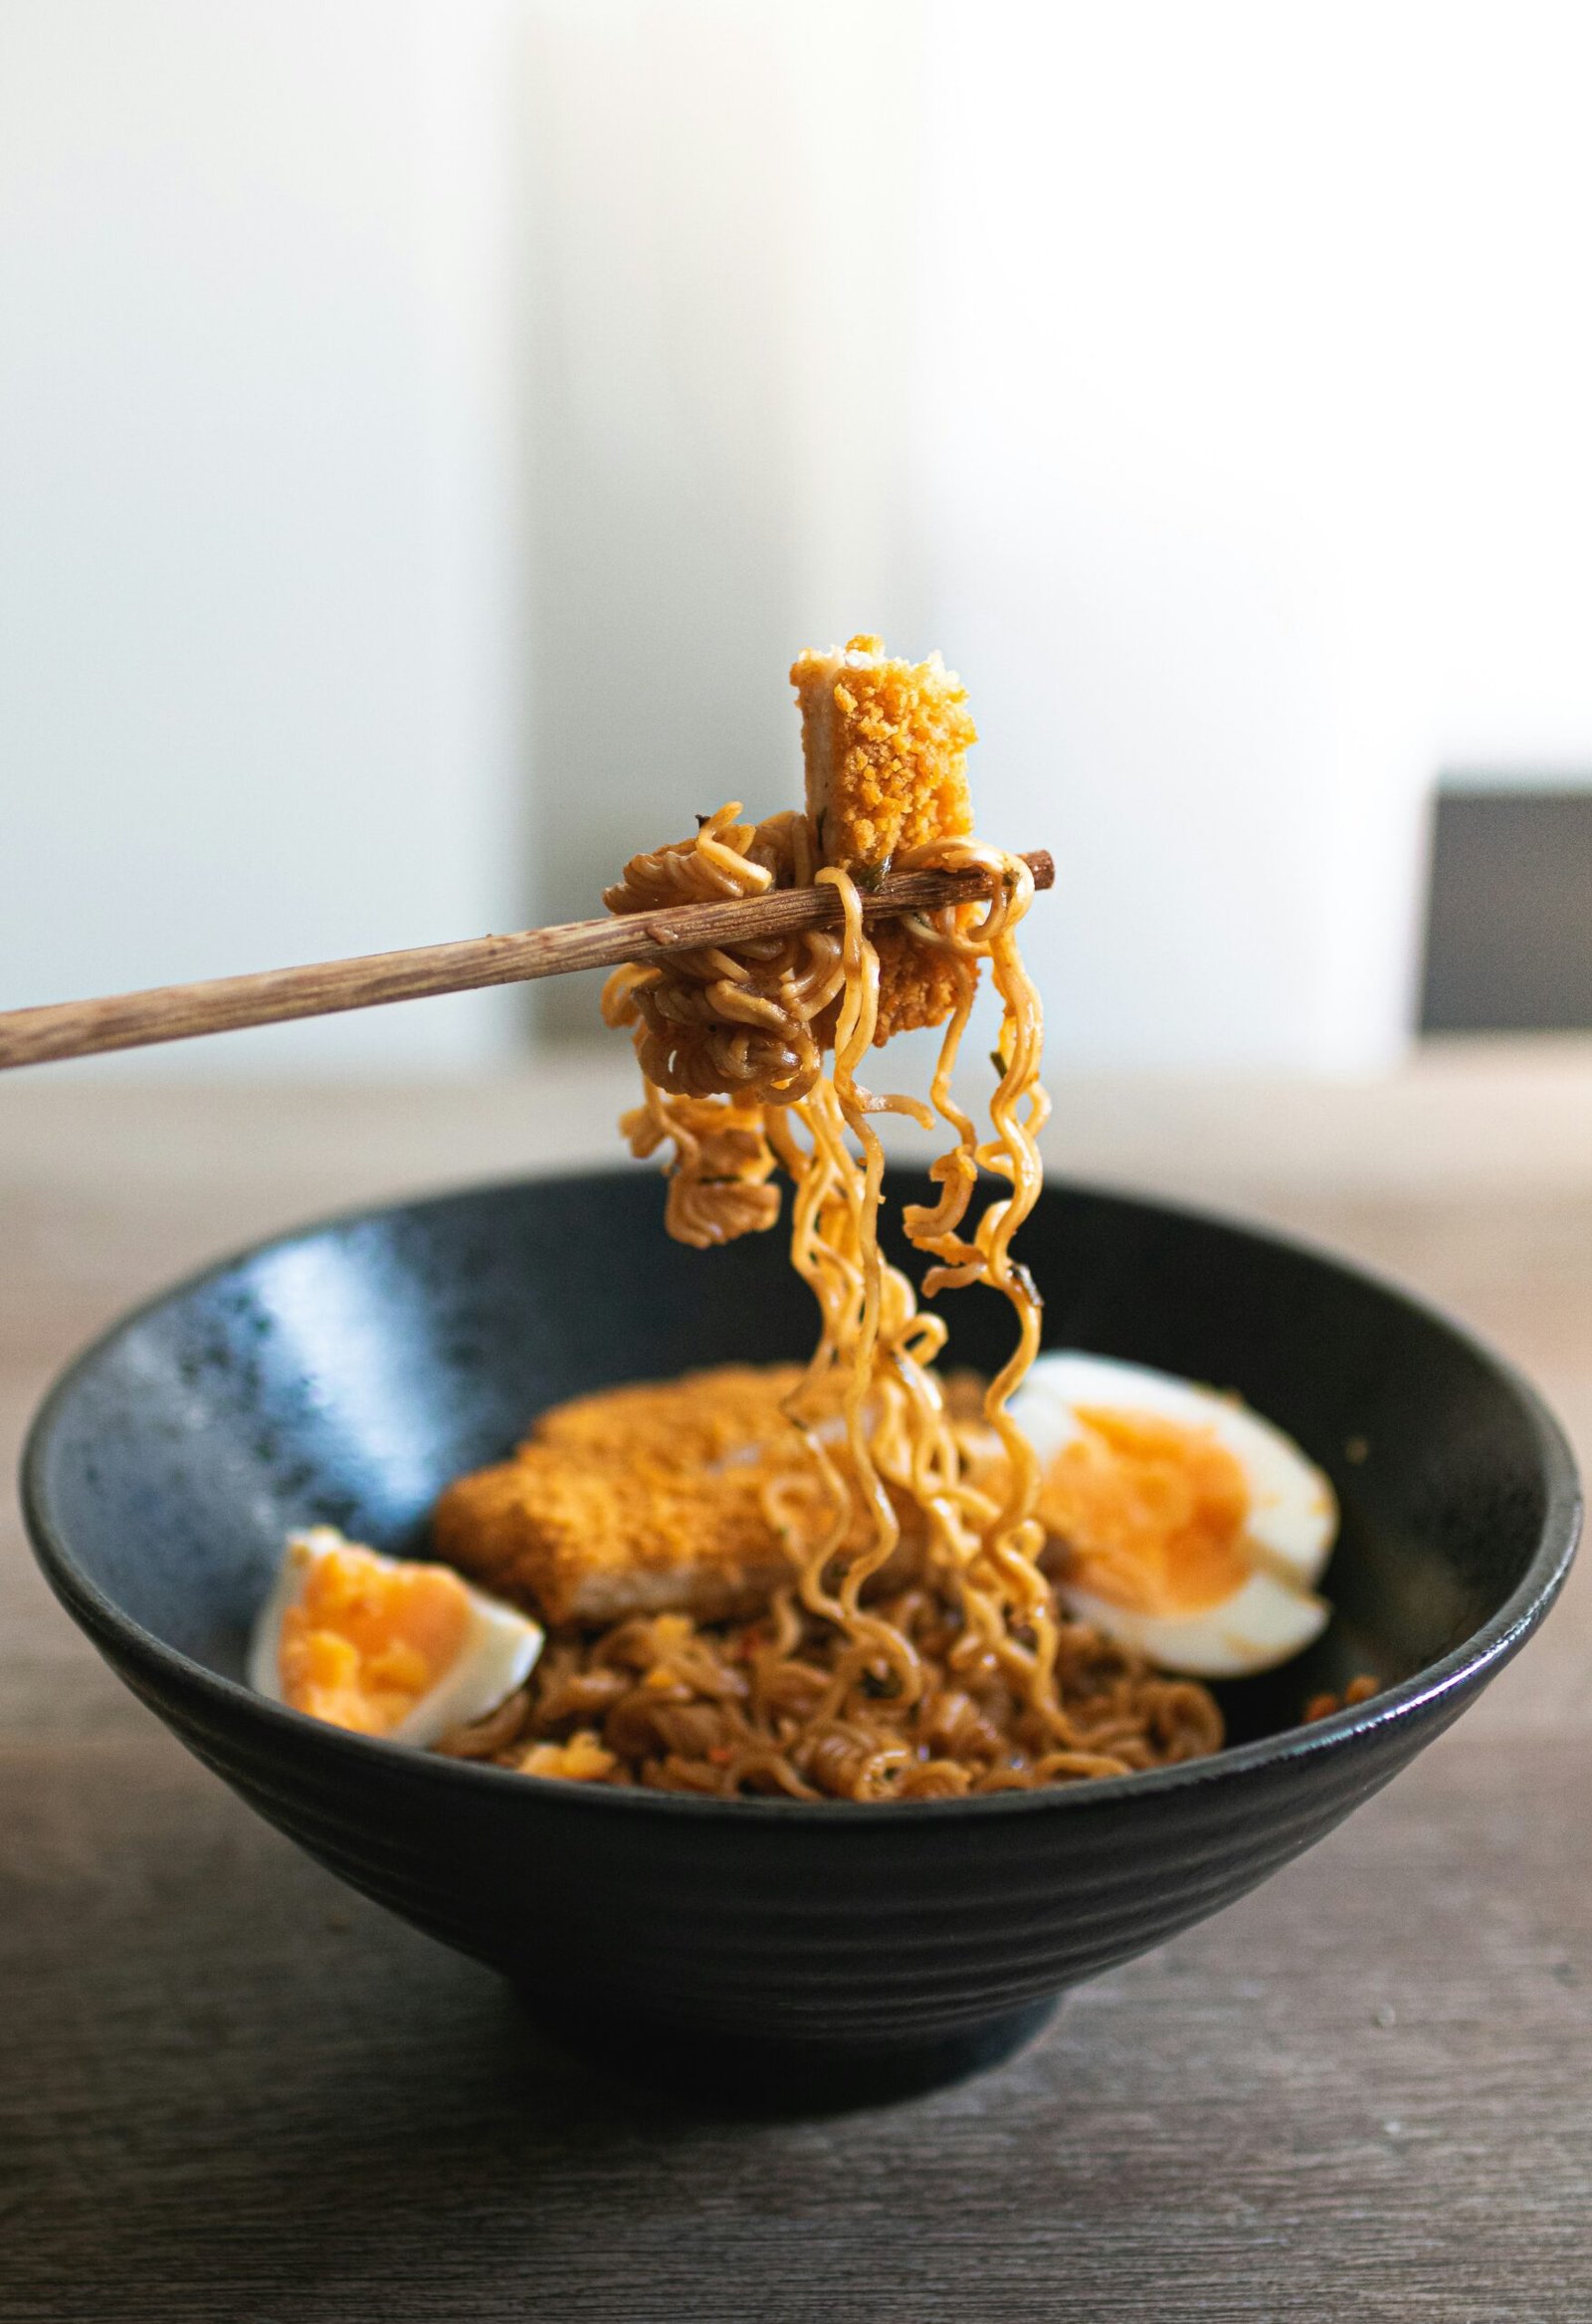
Carbonara has always been about simplicity — eggs, cheese, pasta, and care. This spicy miso carbonara keeps that soul intact while gently introducing a new layer of depth. The umami richness of miso blends beautifully with parmesan and eggs, creating a sauce that feels familiar yet quietly exciting.
This dish isn’t about heat for the sake of heat. It’s about warmth, balance, and learning to trust your timing.
What Is Spicy Miso Carbonara?
Spicy miso carbonara is a modern variation of the traditional Italian dish, using miso paste to enhance flavor instead of altering the foundation. Miso adds saltiness, umami, and body to the sauce, while a touch of heat brings gentle contrast to the richness.
The result is creamy, savory, and deeply satisfying — without cream.
Why Miso Works in Carbonara
Miso mirrors the salty depth of cured meats
It blends seamlessly into egg-based sauces
A small amount adds complexity without overpowering
It enhances richness while staying balanced
Used thoughtfully, miso doesn’t replace carbonara — it supports it.
Recipe Overview
Prep Time: 10 minutes
Cook Time: 20 minutes
Total Time: 30 minutes
Servings: 4
Skill Level: Intermediate
Best For: Comfort meals, creative cooks, quiet evenings
Ingredients You’ll Need
400 g (14 oz) spaghetti or fettuccine
3 large eggs, room temperature
¾ cup freshly grated parmesan or pecorino cheese
1 tablespoon white or spicy miso paste
2 cloves garlic, minced
2 tablespoons olive oil
Freshly cracked black pepper, to taste
Optional heat: chili oil or chili flakes
Salt, for pasta water only
Step-by-Step Instructions
Bring a large pot of salted water to a boil. Cook pasta until al dente. Reserve 1 cup of pasta water before draining.
In a bowl, whisk eggs, grated cheese, and miso paste until smooth and creamy. Set aside.
Heat olive oil in a pan over medium heat. Add garlic and sauté gently until fragrant, about 30 seconds. Remove from heat.
Add hot pasta directly to the pan with garlic oil and toss to coat.
Let the pan cool slightly. This step prevents the eggs from scrambling.
Pour the egg-miso mixture over the pasta, stirring constantly.
Add reserved pasta water gradually until the sauce becomes silky and smooth.
Finish with black pepper and optional chili oil or flakes.
Serve immediately.
Important Cooking Tips
Never add egg mixture over high heat
If sauce thickens too fast, add pasta water slowly
Miso is salty — taste before adding extra seasoning
Trust the process; carbonara rewards patience
Adjusting the Spice Level
Mild: Use white miso only
Medium: Add chili oil at the end
Spicy: Choose spicy miso or add chili flakes gradually
Heat should support the dish, not overpower it.
Serving Suggestions
Serve with:
A light green salad
Roasted vegetables
Warm bread
A calm table and no rush
This dish shines when eaten fresh and unhurried.
Storage & Reheating
Carbonara is best enjoyed immediately. If needed, store leftovers in an airtight container for up to 1 day. Reheat gently over low heat with a splash of water, stirring constantly.
Nutrition Information (Approximate)
Calories: 520 per serving
Protein: 22g
Carbohydrates: 60g
Fat: 24g
Values vary based on ingredients used.
Frequently Asked Questions
Can I add protein? Yes. Crispy mushrooms or tofu work well without overpowering the sauce.
Is this authentic carbonara? It’s inspired by tradition while respectfully evolving it — not replacing it.
A Gentle Closing
Spicy miso carbonara isn’t about reinventing comfort food. It’s about listening to it — then adding just enough curiosity to make it new again.
Cook slowly. Taste gently. Trust yourself.
Try This Next
If you enjoy comforting classics with a twist, try Kimchi Carbonara for another fusion favorite, or Spaghetti Carbonara for the original inspiration.